The Concrete5 content block uses TinyMCE as its WYSIWYG editor. Thanks to this decision, we are able to use several plugins most Concrete5 users haven’t thought about.
One feature I really like is the “template” plugin which allows you to create html snippets which you can insert into the content block. In this tutorial I’m going to show you, how you can create a simple 2 and 3 column table template.
TinyMCE Configuration
You’ll find almost anything you have to know on this page: http://wiki.moxiecode.com/index.php/TinyMCE:Plugins/template. But luckily for you, I’m going to make this even easier for you.
First, you have to go to the Dashboard – Sitewide Settings. In the bottom right corner, you can activate a “Custom” configuration for the rich text editor. Once you’ve enabled it, it will show you some options. What do we need to activate the TinyMCE templates:
- We have to load the template plugin
- There must be a button to display the template dialog
- We have to create at least one template
theme : "concrete", plugins: "inlinepopups,spellchecker,safari,advlink,template", editor_selector : "ccm-advanced-editor", spellchecker_languages : "+English=en", theme_concrete_buttons1 : "template,|,bold,italic,underline,strikethrough,|,justifyleft,justifycenter,justifyright,justifyfull,|,hr,|,styleselect,formatselect,fontsizeselect", theme_concrete_buttons2 : "bullist,numlist,|,outdent,indent,|,undo,redo,|,link,unlink,anchor,image,cleanup,help,code,forecolor", theme_concrete_blockformats : "p,address,pre,h1,h2,h3,div,blockquote,cite", theme_concrete_toolbar_align : "left", theme_concrete_fonts : "Andale Mono=andale mono,times;Arial=arial,helvetica,sans-serif;Arial Black=arial black,avant garde;Book Antiqua=book antiqua,palatino;Comic Sans MS=comic sans ms,sans-serif;Courier New=courier new,courier;Georgia=georgia,palatino;Helvetica=helvetica;Impact=impact,chicago;Symbol=symbol;Tahoma=tahoma,arial,helvetica,sans-serif;Terminal=terminal,monaco;Times New Roman=times new roman,times;Trebuchet MS=trebuchet ms,geneva;Verdana=verdana,geneva;Webdings=webdings;Wingdings=wingdings,zapf dingbats", theme_concrete_font_sizes : "1,2,3,4,5,6,7", theme_concrete_styles: "Note=ccm-note", spellchecker_languages : "+English=en", template_templates : [ { title : "2 Columns", src : "themes/yourTheme/templates/2_columns.html", description : "Adds a 2 columns table" }, { title : "3 Columns", src : "themes/yourTheme/templates/3_columns.html", description : "Adds a 3 columns table" } ] |
There’s one thing you probably have to change. In the two templates I’ve added, there’s a hardcoded path which won’t work on your site. Make sure it points to an existing directory. The content of the html file is rather simple. I modified the example for TinyMCE to make it look like this:
<!-- This will not be inserted --> <div class="mceTmpl"> <table width="98%" border="1" cellspacing="0" cellpadding="0"> <tr> <th scope="col">HEADER 1</th> <th scope="col">HEADER 2</th> </tr> <tr> <td>Sample Data</td> <td>Sample Data</td> </tr> </table> </div> |
How you can insert an HTML snippet
You’re already done, but where can you find the snippets? We you add a new content block, you’ll see a new button:
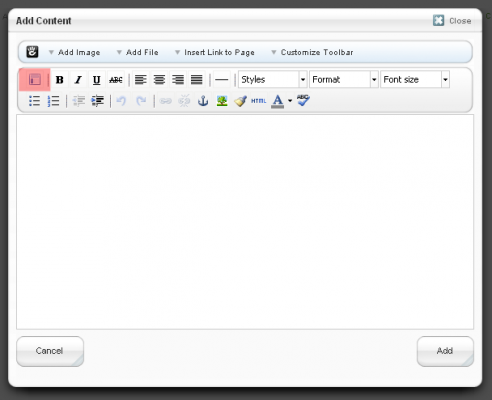
When you click on this button, you’ll see a dialog where you can select the template:
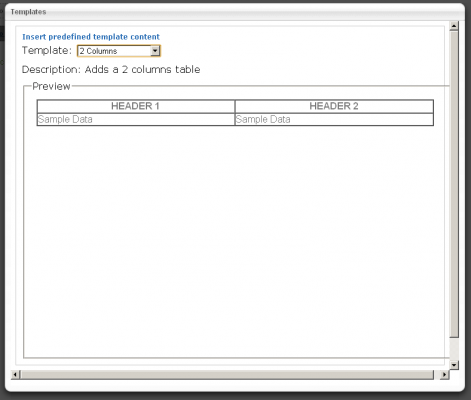
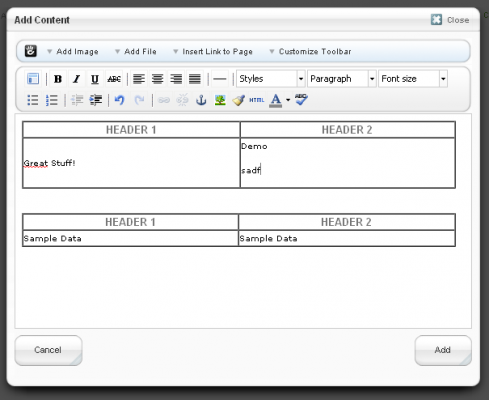
Unfortunately, the insert button is a bit hidden, you have to scroll down to insert the template. You can insert as many snippets into one content block as you want:
I hope you like it and thanks for completely reading this tutorial!
